Plaster has been a go-to building material for centuries, used in structures dating back to ancient civilizations. Even today, many homeowners favor it for its durability and classic look. However, when plaster becomes damaged, it requires careful attention to restore its integrity. Here’s a step-by-step guide to repairing plaster, ensuring your walls are in top shape once again.
Understanding Plaster
Plaster is a mixture of lime, sand, and water, creating a smooth surface once it sets. It’s relatively fragile, prone to cracking, especially when exposed to moisture. Proper sealing with paint is necessary to protect it. When repairing plaster, the goal is to fill cracks and holes, ensuring the surface is as smooth as possible for painting and refinishing.
Remove Loose Plaster
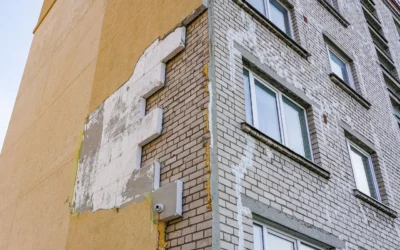
Begin by clearing away any loose plaster surrounding the damage. Use a putty knife or a hammer and chisel for stubborn areas. Removing old, flaky material ensures a solid foundation for the new plaster. Afterward, clean the surface with a damp cloth to eliminate dust and debris.
If the wall has been painted multiple times, use a paint scraper to remove old layers of paint around the damaged areas. This step prepares the surface for the plaster to adhere effectively, reducing the chances of future peeling.
Smooth the Surface
Once the loose plaster is removed, use a small trowel or even your fingers to smooth the edges of the damage. This process prevents bumps or dips that could lead to cracks when new plaster is applied. The goal is to ensure the surface is as even as possible, giving the new plaster a solid base to rest on.
If unsure of the smoothing technique, consulting a professional contractor for advice or assistance is always a good idea to avoid mistakes.
Patch the Hole
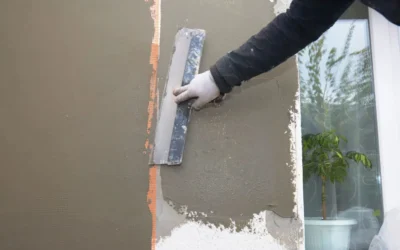
Next, mix a fresh batch of plaster to fill the hole. Apply it directly to the damaged area using a putty knife or trowel. For best results, use a small amount of water to smooth the surface but avoid excess moisture, as it can weaken the plaster. Allow the patch to dry completely, which could take several hours, depending on the size of the area.
Refine the Patch
After the plaster has dried, use a damp sponge to smooth out the patch. This step helps remove excess plaster and evens out the surface. It’s important not to over-wet the area to avoid damaging the fresh plaster.
Once smoothed, let the patch dry fully before proceeding to the next step. The repair will be more durable if the plaster is allowed to cure for at least 24 hours before any paint is applied.
Paint the Area
Once the plaster is fully dry, it’s time to apply paint. Use a brush or roller to cover the patched area. You may need to apply several coats to match the existing finish on your wall. Opt for high-quality paint, such as satin or semi-gloss, for a smooth, long-lasting finish.
Each layer of paint should be allowed to dry completely before adding another coat to prevent streaking or uneven coverage. If needed, professional painting services can help achieve the desired results for a polished, smooth finish.
Repairing Larger Cracks and Holes
For significant damage, like larger cracks or holes, a more involved repair process is necessary. Start by creating a backing with materials such as chicken wire or strips of wood. This backing provides extra support for the plaster.
Next, apply plaster in two stages: press the mixture into the hole first, then smooth it over with a damp sponge. Allow it to dry completely, then sand down the edges to make them flush with the surrounding wall. Fill any remaining gaps with caulk and cover the repair with mesh tape to prevent paint from seeping underneath.
Let the Plaster Dry
Plaster must be fully dry before any painting or additional work is done. Rushing this step can lead to peeling paint or weak adhesion. Make sure the repair is completely set before moving forward. If water or mold damage is present, address these issues before beginning the repair to prevent future complications.
By following these steps, plaster repairs can be completed successfully, restoring your walls to their original beauty. Proper preparation and patience are key to ensuring the repair is durable and seamless.