Last updated: August 20, 2026
Table of Contents
- What Those Thin Lines Are Actually Telling You
- What Makes Stucco Crack in the First Place
- Tools and Materials to Gather
- Prep Work Decides How Long the Repair Lasts
- Step-By-Step Guide to Fix Stucco Cracks
- Finishing, Priming, and Painting
- When to Bring in a Professional
- Budgeting for Stucco Crack Repair
- Quick Checklist Before You Start
- Common Questions About Stucco Cracks
- Where to Go From Here
Stucco crack repair is the rare exterior project where acting in the first season costs a few dollars and waiting a few years costs thousands.
A hairline crack above a window looks cosmetic, but rain and sprinkler spray are already finding a path into the wall, and the lath and framing behind the surface have no fast way to dry out.
What Those Thin Lines Are Actually Telling You
Crack width tells you almost everything about the method you need.
Hairline cracks measure less than 1/16 inch and take flexible caulk.
Medium cracks run from 1/16 inch to 1/4 inch and take a stucco patch.
Large or structural cracks measure more than 1/4 inch, and once they approach 1/2 inch, they deserve a professional opinion before any repair material goes in.
Ignoring hairline cracks is the expensive mistake, because trapped moisture swells wood sheathing, rusts the lath, and turns solid material brittle.
By the time you see a bulge or soft spot, the repair has moved from a tube of caulk to a section of wall.
Sealing early is cheaper than replacing later, which is why a scheduled stucco crack repair beats an emergency call after a wet winter.
What Makes Stucco Crack in the First Place
Stucco cracks form because cement plaster is rigid and the house underneath it is not, and four forces cause nearly every crack on exterior walls.
Shifting Foundations and Structural Stress
Shifting foundations transfer stress straight into the stucco, and expansive soil, drought cycles, and poor drainage all move a slab enough to open a wall.
Look at the corners of windows and doors first, since openings interrupt the lath and concentrate stress into a diagonal line running away from the corner.
Long horizontal or stair-step cracks near the base of the house point at the structure rather than the finish.
Inspect for movement first, checking that doors and windows still close squarely and noting whether a crack has widened since last year.
A patch over an active structural problem will reopen within a season.
Weather Swings and Thermal Cycling
Temperature changes expand and contract stucco every day, and that constant cycling fatigues the surface until the weakest section splits.
Ultraviolet exposure degrades the surface over time and leaves it brittle.
Check the sun-exposed elevations first, usually the south and west walls.
If the same wall keeps cracking after you fix it, thermal movement is the likely cause, and flexible repair material matters more than any other choice.
Moisture Intrusion and Water Damage
Water is the reason a small crack becomes a bigger problem.
Moisture enters through the crack, moves behind the stucco, and cannot escape quickly because the wall sheds water outward rather than draining it from within.
Wood swells and eventually rots, fasteners corrode, and the bond between the stucco and the lath fails.
Rust-colored streaks, chalky deposits, dark staining under windows, bulges, and hollow-sounding areas all point at water behind the surface.
Soft or spongy spots mean rot, and that is a stop sign for a homeowner repair.
Physical Impacts and Surface Damage
Ladders, string trimmers, hose reels, car doors, and furniture moved along a wall all chip stucco and start small cracks and holes.
Sprinkler heads aimed at the wall soak the same spot daily and soften it over time.
Trim shrubs back a foot from exterior walls, redirect sprinklers, keep gutters clean, and move stored items that rub against the finish.
Tools and Materials to Gather
Buy everything in one trip, since most steps have curing windows you cannot interrupt once started.
Repair materials
- Paintable elastomeric or acrylic caulk for hairline cracks
- Pre-mixed or bagged stucco patch compound for larger cracks
- Masonry bonding agent and exterior masonry primer
- Elastomeric or exterior acrylic paint matched to the existing stucco
Tools
- Utility knife or cold chisel for opening the crack
- Wire brush or stiff brush for cleaning
- Putty knife and small trowel for the patching material
- Rubber float, damp sponge, and a stiff brush for texture
- Caulk gun, bucket, spray bottle, and a shop vacuum
Protection
- Safety glasses, work gloves, and an N95 dust mask
Silica dust is a real hazard, so wear the mask and safety glasses for any grinding, chiseling, or brushing.
Prep Work Decides How Long the Repair Lasts
Preparation is the difference between a long-lasting repair and one that reopens next winter, and rushing it is the most common reason a stucco patch fails.
Run a utility knife along the crack to pull out anything crumbling, then tap the surrounding wall and remove material that sounds hollow.
A stiff brush followed by a shop vacuum pulls dirt and debris out of the cavity, and residue left behind blocks the strong bond you are trying to create.
If the lath is rusted through, the sheathing is soft, or the crack runs deeper than the stucco itself, stop and get an evaluation before sealing the problem inside the wall.
Brush a masonry bonding agent onto the clean, damp edges of the cavity last, so the new patching material grips the existing stucco instead of sitting in it.
Step-By-Step Guide to Fix Stucco Cracks
Match the method to the crack width, and read the manufacturer’s instructions on your product, because cure times vary by formula.
Hairline Cracks: The Caulk Method
Use a flexible, paintable caulk for cracks under 1/16 inch, and up to about 1/2 inch if the crack is stable and shallow, because elastomeric sealant moves with the wall and rigid filler cannot.
- Clean the fissure with a stiff brush, vacuum the dust, and let the area dry completely.
- Cut the tube tip small, around 1/8 inch, so you get a fine bead rather than a wide smear.
- Run a continuous bead along the crack, pressing the tip into the opening so the caulk fills it rather than bridging it.
- Gently smooth the bead flush with a wet finger or small tool, keeping your hands clean with a damp rag.
- Let the caulk cure fully before painting, usually 24 to 48 hours depending on temperature.
A bead sitting proud of the surface will shine through paint, so press it flush while workable.
Wider Cracks: Patching and Layering
Cracks from 1/16 inch to 1/4 inch take patching material instead of caulk.
- Widen and undercut the crack into a V-shape with a utility knife or chisel, cutting it wider at the back than at the face so the patch locks into place.
- Remove every piece of loose or deteriorated material, then brush and vacuum the cavity clean.
- Apply bonding agent inside the prepared cavity and let it set according to the label.
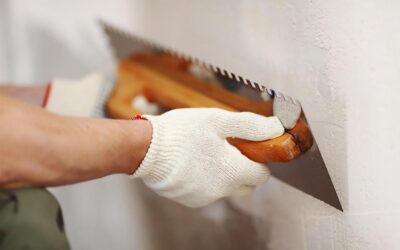
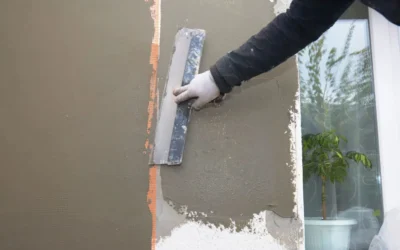
- Press the stucco patch in with a putty knife or trowel in thin layers no thicker than 1/4 inch, working the first layer hard into the back of the cavity.
- Let each layer dry completely before the next, misting with water if the product calls for damp curing.
- Feather the final layer past the edges so it blends into the surrounding wall instead of stopping at a hard line.
Thin layers are not optional, because a thick single fill shrinks as it dries and cracks straight down the middle.
Matching Texture So the Patch Disappears
Texture matching is what separates an invisible repair from an obvious rectangle on your house.
Hold a flashlight at a sharp angle to the wall late in the day, and the shadows will show whether you have a sand float, dash, lace, skip trowel, or smooth surface.
A rubber float and damp sponge produce sand and float finishes, a stiff brush flicked at the wall produces dash, and a trowel knocked down over a splattered coat produces lace and skip trowel.
Practice on scrap board first, running three or four passes at the consistency you will use on the house and comparing them to the wall in the same light.
Texture the final coat while it is still pliable, and work the pattern slightly past the patch edges so the transition disappears.
Finishing, Priming, and Painting
Knock down high spots after the patch has fully cured, using a sanding sponge or the edge of a trowel with light pressure.
Apply exterior masonry primer over the repaired area and six inches beyond it, since fresh stucco is alkaline and absorbs paint unevenly without primer.
Use elastomeric or exterior acrylic paint for the topcoat, because both flex with temperature changes instead of splitting at the patch line.
Feather the paint well past the repair, and if the wall has faded, painting the full elevation corner to corner gives a professional-looking finish that spot painting cannot match.
Paint only after the patch sets properly and cures fully, usually days rather than hours.
When to Bring in a Professional
Call for an evaluation when cracks exceed 1/4 inch, when the same crack keeps returning after you fix it, or when cracking appears across several walls at once.
Get help immediately if you find moisture damage, soft sheathing, or wood rot, since those repairs involve opening the wall and rebuilding the assembly in layers.
Structural settlement also belongs with a professional, because the crack is a symptom and sealing it does nothing about the movement causing it.
Widely cracked walls often need full resurfacing rather than dozens of patches.
The Portland Cement Association publishes technical guidance on cement plaster performance and control joints if you want to research the material science first.
Budgeting for Stucco Crack Repair
Cost estimates for 2026 put professional crack repair at roughly $19.42 to $23.47 per linear foot, making a 20-foot repair a few hundred dollars rather than a few thousand.
Second-story or hard-to-reach walls add scaffolding, moisture damage adds demolition and drying time, and difficult texture or color matching adds skilled hours.
Set aside 15 to 20 percent above the quote as contingency, since hidden damage only appears once the loose stucco comes off.
Quick Checklist Before You Start
- Tools, repair material, and safety glasses on site before you open the first crack
- Loose stucco removed, cavity brushed and vacuumed clean
- Surface dry, with no bulges, stains, or soft spots suggesting deeper trouble
- Bonding agent applied and set before the patch goes in
- Layers 1/4 inch or thinner, each dried completely before the next
- Cure times per the manufacturer’s instructions, not your schedule
- Finished patch checked for adhesion, texture match, and feathered edges
Common Questions About Stucco Cracks
Can I paint over a stucco crack instead of repairing it?
No.
Paint bridges a crack for a season at most, then splits along the same line while water keeps entering behind it.
How wide is too wide for a homeowner repair?
Anything over 1/4 inch deserves an inspection, and anything approaching 1/2 inch should be evaluated before repair.
Width alone is not the whole story, since a growing 1/8 inch crack is more concerning than a stable 1/4 inch one.
How long before I can paint a fresh stucco patch?
Plan on several days for cement-based patching material and 24 to 48 hours for caulk, since painting early traps moisture and causes peeling.
Where to Go From Here
Caulk handles hairline cracks under 1/16 inch, patching stucco in thin layers handles everything from 1/16 to 1/4 inch, and anything wider or wetter belongs with a contractor.
Flexible repair material matters in every case, because the wall will keep moving after the repair is done.
Walk your exterior walls twice a year, and mark new cracks with a pencil line and a date so you can tell whether they are growing.
Catching a crack at 1/16 inch is a tube of caulk and an afternoon, and catching it at 1/2 inch is a contractor, a scaffold, and a section of rebuilt wall.
Crack repair often pairs with other exterior work, and the crews that handle exterior siding or drywall and interior finishing can assess the whole envelope in one visit.
Reviewing the full range of exterior services is a practical first step toward a written estimate.

Bryan Peralta is the Owner and CEO of Modern Builders, a Southern California contractor specializing in stucco remediation, waterproofing, and building envelope restoration. With years of experience helping homeowners and commercial property owners protect their properties, Bryan is known for delivering high-quality craftsmanship and long-lasting solutions. Through Stucco Contractor Pro, he shares expert insights on stucco repair, waterproofing, and exterior building maintenance.