Last updated: August 20, 2026
Table of Contents
- What Exterior Stucco Is Made Of and How It Wears Out
- 10 Warning Signs Your Walls Are Ready for Resurfacing
- Sizing Up the Damaged Area Before You Buy Materials
- Materials and Mixes: Portland Cement and the Alternatives
- Preparing the Stucco Surface
- Repairing the Damaged Area
- Applying the Scratch Coat
- Leveling with the Brown Coat
- Finish Coat and Matching the Existing Texture
- Alternative Resurfacing Products and Systems
- Painting and Protecting Exterior Walls
- What Resurfacing Costs and How Long It Takes
- Where a DIY Repair Project Should Stop
- Keeping Stucco Sound Between Projects
- Frequently Asked Questions
- Mistakes That Undo an Otherwise Good Job
- Get an Expert Look at Your Walls
Stucco resurfacing is the process of cleaning, repairing, and re-coating an existing stucco wall so the surface sheds water again instead of absorbing it.
This guide is for homeowners who want to know whether their exterior walls need attention this year, and for DIYers and property managers pricing or supervising a repair project.
It covers the warning signs, the assessment, the materials, and the coating process, so you can separate a cosmetic blemish from a structural problem.
Three approaches cover almost every job.
A cement render overlay rebuilds the wall with a Portland cement base coat and a new finish coat, an acrylic overlay bonds a thin flexible layer over old stucco that is still sound, and a patch-and-recoat approach limits new material to the damaged area before blending that repaired area into the surrounding stucco surface.
Choosing among them starts with an honest look at the wall, which is what stucco resurfacing contractors evaluate before quoting anything.
What Exterior Stucco Is Made Of and How It Wears Out
Exterior stucco is portland cement plaster: portland cement, sand, lime, and water, applied in layers over metal lath or directly onto masonry.
Traditional three-coat stucco is a nominal 7/8 inch thick, built from a 3/8 inch scratch coat, a 3/8 inch brown coat, and a 1/8 inch finish coat, per ASTM C926, the standard governing mixing, application, and curing of portland cement-based plaster.
Synthetic stucco, sold as EIFS, uses foam board, a mesh base coat, and an acrylic finish, and it drains water differently than cement stucco siding does.
Resurfacing becomes necessary because the finish coat is the sacrificial layer of the system.
Sun bakes the pigment out of it, thermal cycling opens hairline cracks, and every rain event pushes moisture through those openings toward the lath.
Once the surface stops shedding water, the damage moves inward, which is why a wall that looks merely tired is often already leaking.
Climate drives the timeline.
In the Southwest, intense UV and 40-degree daily swings chalk and craze finishes years early, while coastal walls take salt air and persistent damp that encourages mildew and discoloration.
Well-maintained stucco can last more than 50 years, but only if the outer coat is renewed when it starts to fail.
10 Warning Signs Your Walls Are Ready for Resurfacing
Any one of these signs justifies a closer look, and three or more usually means the whole elevation needs work rather than a spot repair.
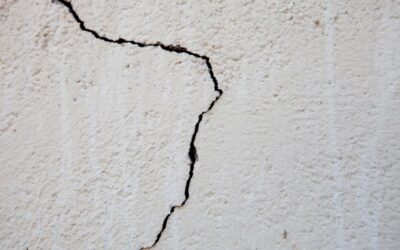
- Map cracking across a wide area. A fine web of hairline cracks spread over several feet points to a failing finish coat, not a settling foundation.
- Cracks wider than 1/16 inch. Small cracks at that width let water reach the lath and will not close on their own.
- Staining below windows, sills, and roof edges. Dark streaks and rust-colored bleed marks show water running behind the surface instead of over it.
- Soft or spongy spots. A stucco surface that gives under thumb pressure has lost its bond or has rot behind it.
- A hollow sound when tapped. Tap along the wall with the handle of a hammer, because a drum-like tone means delamination.
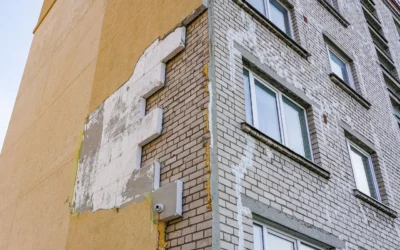
- Chipping, flaking, or spalling. Loose debris falling off the wall means the surface layer has lost cohesion.
- Persistent mildew. Dark green growth that returns within weeks of a wash signals the wall is staying wet.
- Chalky residue on your hand. Fine dust transferring off the wall means the binder has broken down.
- Efflorescence, the white powdery bloom. Salt deposits mean moisture is moving through the material and evaporating at the face.
- Fading, patchy discoloration, and mismatched old repairs. Uneven appearance across the home’s exterior says previous patches were never blended and the finish is past its service life.
Test for moisture before deciding anything.
A pin-type meter pushed into a small drilled hole near a suspect area gives a real reading, and anything above roughly 19 percent moisture content in the sheathing means active intrusion.
Resurfacing over active intrusion traps the problem, so confirm how to tell if stucco has water damage before ordering material.
Safety and structure come first, because sagging walls, rotted framing, or damage around a load-bearing element are not surface issues and no coating will fix them.
Sizing Up the Damaged Area Before You Buy Materials
Document the extent and depth before you touch a tool.
Photograph every elevation in even light, then take close-ups with a tape measure or coin in frame for scale, since those photos become your reference when comparing bids later.
Probe for delamination by tapping the wall in a grid and marking every hollow zone with chalk, then open one small test area with a chisel down to the lath and check the substrate for rust, rot, or crumbling paper.
Measure crack widths with a crack gauge, log them with the date, and re-measure after 30 to 60 days.
A crack that widens is moving and needs a flexible treatment or structural correction, while a stable crack can be filled and coated.
A stucco patch makes sense when the damaged area is under roughly 10 percent of an elevation, the surrounding stucco is sound, and the existing texture is simple enough to match, which is the same test that decides whether a cracked wall can simply be patched.
Full resurfacing wins when damage is spread across the wall, the texture is hard to blend, or you would end up with a visible quilt of repairs.
Cracking, spalling, and delamination all trace back to a cause, and identifying that cause is the step most DIY projects skip.
Materials and Mixes: Portland Cement and the Alternatives
Match the repair mix to what is already on the wall, because a repair stronger than its host cracks the host.
A traditional Portland cement mix, roughly 1 part cement to 3/4 to 1 1/2 parts lime to 2 1/2 to 4 parts sand by volume, is the right call over cement stucco.
Lime gives the mix workability and a little forgiveness, and leaving it out produces a brittle patch.
Acrylic overlays are polymer-modified coatings applied 1/16 to 1/8 inch thick that flex, bond to painted surfaces better than cement does, and cure fast, though they breathe less and belong on walls that are dry and staying dry.
These additives earn their place at the manufacturer’s dose:
| Additive | What it does |
|---|---|
| Acrylic bonding admixture | Improves adhesion to old stucco and dense substrates |
| Fiber reinforcement | Reduces shrinkage cracking in the base coat |
| Lime | Adds workability and flexibility to the mix |
| Water reducer | Keeps the mix workable at a lower water ratio |
One rule governs all of it, and the new material should be equal to or slightly weaker and more permeable than the existing stucco, never harder.
Preparing the Stucco Surface
Preparation determines whether the new coat bonds or fails, and it is where most of the labor hides.
Pressure wash the walls at 1,500 to 2,500 psi with a wide fan tip held about 18 inches off the surface to strip dirt, chalk, mildew, and loose coating.
Higher pressure gouges soft stucco, so test an inconspicuous corner first.
Work a cold chisel and hammer around each hollow zone until you reach material that rings solid, then knock the edges back to a firm perimeter.
Follow with a wire brush to clear dust and loose debris, which also exposes the underlying surface for a better mechanical bond.
Slick, sealed, or painted surfaces need a bonding agent rolled over the prepared area and left to reach the tack stage on the label, and skipping that step is the most common cause of a new coat that peels within a year.
Mask windows and trim, cover plants, and set up scaffolding before mixing anything, because once the mix is wet, the clock runs.
Repairing the Damaged Area
Fix the substrate first, because coatings do not repair what is behind them.
Widen every crack to sound edges with a chisel or a crack-chasing blade, cutting a small V or square profile about 1/4 inch deep, then blow the dust out, since a crack filled over dust is a crack that reopens.
Replace corroded lath and damaged sheathing by cutting back to solid framing, installing new galvanized lath with proper overlaps, and fastening into studs rather than sheathing alone.
Get the water details right while the wall is open.
Install or replace weep screed at the base, head flashing over openings, and a code-compliant weather-resistive barrier lapped shingle-style so water drains out rather than in.
This is the part of the job that decides whether the restoration lasts 5 years or 30.
Applying the Scratch Coat
The scratch coat is the base coat that locks new work to the lath, and it goes on at a nominal 3/8 inch.
Mix to the manufacturer’s ratio and no wetter, because excess water raises shrinkage and lowers strength.
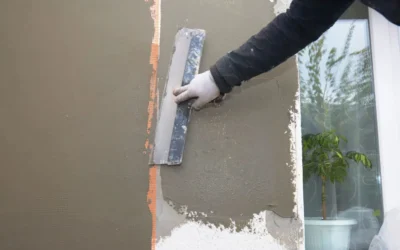
Trowel it on with firm pressure so material is pushed fully through the lath and keys behind it, since full embedment rather than thickness is what holds the system together.
Score the surface horizontally with a scarifier or notched trowel while it is still green, cutting grooves about 1/8 inch deep to create the mechanical key the brown coat grabs.
Keep the coat damp for at least 48 hours before moving on.
Leveling with the Brown Coat
The brown coat is the leveling layer, and it is what makes the finished wall look flat instead of wavy.
Apply it at a nominal 3/8 inch over the cured scratch coat, filling low spots first, then bringing the whole panel up together.
On a resurfacing job the base coat can run up to about half an inch where you are building out to meet the plane of the existing stucco.
Screed with a straightedge worked in overlapping arcs, float the surface once it firms up, and check the wall plane against a string line so new work meets old flush at the transition.
Mist lightly two or three times a day for at least 48 hours, then let the coat dry 7 to 14 days before the finish, because rushed curing is why so many repairs craze.
Finish Coat and Matching the Existing Texture
The finish coat carries the color and the desired texture, and it is applied at a nominal 1/8 inch.
Mix a full batch for the whole elevation when you can, because color mixed in separate batches rarely matches across a wall.
Match the existing texture with the tool that made it.
A sponge float creates sand, and Santa Barbara finishes, a steel trowel with a knockdown pass creates the classic California knockdown, and a comb or brush creates swirl and lace patterns.
A smooth finish, trending in current renovations, takes the most skill because it hides nothing.
Practice on a scrap board first, testing pressure, timing, and wrist motion until your sample matches a photo of the wall.
Then blend outward by feathering the new finish 12 to 18 inches past the patch boundary and breaking the transition at a natural line such as a corner, a control joint, or a downspout.
Alternative Resurfacing Products and Systems
Acrylic resurfacing systems and cement render solve the same problem with different tradeoffs.
Cement render is thicker, breathable, and repairable with the same material 20 years from now, though it is heavier, slower to cure, and less forgiving of movement.
Acrylic systems go on thin, cure in a day, resist hairline cracking, and stick to surfaces cement struggles with, but they cost more per square foot and trap vapor if the wall is not dry.
For large-area overlays, a reinforced acrylic system with fiberglass mesh embedded in the base coat is the safer specification, because the mesh bridges existing cracks and spreads movement across the panel.
Historic stucco needs different thinking.
Original lime-based plaster is soft and permeable, and a hard cement or acrylic coating over it traps moisture and spalls the original material from behind, so use a lime-compatible mix and check local preservation rules before starting.
Painting and Protecting Exterior Walls
New stucco must cure at least 7 to 10 days before paint, and 28 days is better because fresh cement is highly alkaline and will burn through coatings applied too early.
Use vapor-permeable acrylic paint and primer with a perm rating that lets the wall dry outward, since oil-based products and heavy sealers hold moisture inside the material.
Specify an elastomeric primer where hairline cracks are the concern.
Elastomeric coatings stretch across small cracks and seal them against rain, though they should not be used to hide cracks that are still moving.
Two thin coats outperform one thick coat, and back-rolling after spraying works the paint into the texture rather than bridging over it.
What Resurfacing Costs and How Long It Takes
Costs vary by region, access, and how much repair the walls need before coating starts.
| Scope | Typical range |
|---|---|
| Pressure wash and retexture, 1,500 sq ft | $4,500 to $7,500 |
| Smoothing stucco, 1,500 sq ft | $12,000 to $14,000 |
| Full resurfacing, 3,000 sq ft home | $38,000 to $40,000 |
Resurfacing stays well below full replacement because the existing stucco and lath remain in place, and repairing early prevents the framing work that follows a long leak, which is the expensive end of what full remediation costs.
Plan on roughly 4 to 6 working days for a single-story 1,500 square foot house, and 10 to 15 days for a two-story 3,000 square foot house once scaffolding setup and takedown are counted.
Cure time, not labor, sets the calendar.
With 48 hours of moist curing between coats and 7 to 14 days before the finish, a proper three-coat job spans 3 to 4 weeks even though crews are on site for part of that time.
Where a DIY Repair Project Should Stop
Call a professional the moment the job crosses from surface to structure.
Any evidence of water intrusion behind the wall, including soft sheathing, rotted framing, or interior staining, needs a contractor who can open the assembly, dry it, and rebuild the flashing correctly.
Large-area or multi-coat work is also a poor first project, because keeping a wet edge across a two-story elevation and holding one texture over hundreds of square feet are skills that take repetition.
Hire a licensed stucco specialist when you want a warranty that means something.
Licensing carries insurance and a complaint process, and manufacturers of acrylic and EIFS systems only honor product warranties when a certified applicator installs them.
Ask for the license number, proof of insurance, photos of comparable jobs, and warranty terms in writing.
Keeping Stucco Sound Between Projects
Inspect the home’s exterior twice a year, in spring and after the first heavy rains, walking every elevation to look for new cracks, stains, and soft spots.
Maintain the details that feed water to the wall.
Clear gutters, extend downspouts away from the base, keep sprinklers off the stucco, trim vegetation back 12 inches, and check roof-to-wall flashing and kickouts annually.
Seal small cracks while they are small, because a crack under 1/16 inch takes a tube of elastomeric sealant and 10 minutes, and the same crack two winters later can take out a section of lath.
Frequently Asked Questions
How long does new stucco need to cure before painting?
Wait a minimum of 7 to 10 days, and 28 days if the schedule allows, because painting sooner traps alkalinity and moisture and causes peeling and blotchy color.
Can I resurface over painted stucco?
Yes, with preparation, which means pressure washing the walls, removing all peeling paint, and applying a bonding agent or an acrylic system rated for painted substrates.
How long does resurfaced stucco last?
A properly prepared and cured job lasts 20 to 30 years, and the wall system beneath it can exceed 50 years with regular maintenance.
Is resurfacing worth it on 40-year-old stucco?
Older stucco is often an excellent candidate, provided it is structurally sound, well bonded, and free of widespread moisture problems.
Will resurfacing fix my cracks permanently?
It fixes stable cracks, while moving cracks need the underlying cause corrected first or they will telegraph through the new coat.
Mistakes That Undo an Otherwise Good Job
Using an overly strong repair mix is the most damaging error, because a high-cement patch with no lime is harder and less permeable than the wall around it, so stress concentrates at the perimeter and cracks the existing stucco.
Poor texture matching is the most visible error, and a patch applied with the wrong tool, the wrong timing, or a different sand gradation reads as a bright rectangle from the street no matter how well it performs.
Rushing the cure ranks a close third, since coating over a base that has not reached strength produces crazing that shows up months later.
Skipping the cause is the most expensive error, and resurfacing without correcting the flashing, grading, or sprinkler problem that soaked the wall buys a few dry seasons and nothing more.
Get an Expert Look at Your Walls
If your walls show several of the signs above, a professional evaluation will tell you whether a patch, an overlay, or full resurfacing is the right call before you spend anything on material.
Modern Builders
3801 S. Michillinda Drive, Pasadena, CA 91107
Phone: (626) 737-0053
Email: bryan@modernbuilderscali.com
California Contractor License #1079589

Bryan Peralta is the Owner and CEO of Modern Builders, a Southern California contractor specializing in stucco remediation, waterproofing, and building envelope restoration. With years of experience helping homeowners and commercial property owners protect their properties, Bryan is known for delivering high-quality craftsmanship and long-lasting solutions. Through Stucco Contractor Pro, he shares expert insights on stucco repair, waterproofing, and exterior building maintenance.